


You can spend hundreds of dollars on a microphone and still ruin a recording with one loud “P.” That’s where a pop filter comes in.
Pop filters are simple microphone accessories designed to reduce plosives. These are the powerful bursts of air created when you pronounce certain consonants, especially sounds such as “P” and “B.”Say “podcast” while holding your hand a few inches in front of your mouth. Feel that little burst of air?
Now imagine that air hitting a sensitive condenser microphone capsule. Instead of a clean word, you may hear an unpleasant low-frequency pop.
A good pop filter sits between you and the microphone and reduces that blast of air before it reaches the capsule.
For singers, podcasters, voice actors, YouTubers, and anyone recording speech, it’s one of the cheapest ways to improve a recording setup.
What is the Best Pop Filters?
Here are some of the best pop filters to consider.
1. Stedman Proscreen XL V2 – Best Overall Pop Filter
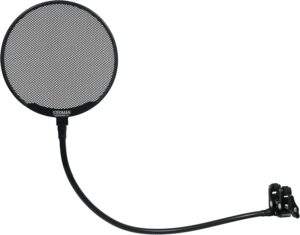
The Stedman Proscreen XL V2 is my overall choice if you want a professional pop filter you can keep for years. Most traditional pop filters use layers of fabric or nylon. Stedman takes a different approach.
The Proscreen XL V2 uses a patented metal screen designed to redirect bursts of air downward and away from the microphone rather than simply trying to absorb them. That design is particularly useful when recording vocals close to a microphone.
The screen measures a little over six inches in diameter, giving singers and voice actors plenty of coverage.
Stedman also equips the V2 with a 16.5-inch adjustable gooseneck and universal clamp. The clamp can attach to boom arms and stands up to 1.5 inches wide.
Metal has another advantage. You can clean it. That’s particularly useful in studios where several singers use the same microphone setup.
The downside is price. The Proscreen XL V2 costs considerably more than a basic nylon filter.
But if you’re building a serious vocal, voiceover, or podcast studio, I’d rather buy one good filter than repeatedly replace cheap ones.
Best for: Professional vocals, voiceovers, podcasts, and recording studios.
2. Nady MPF-6 – Best Budget Pop Filter
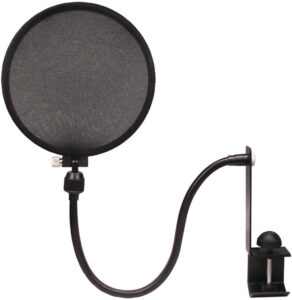
You don’t need an expensive metal pop filter to reduce plosives. The Nady MPF-6 represents the traditional approach. It uses a large screen and flexible gooseneck that you can position between your mouth and microphone.
This type of filter is particularly useful for beginners because it’s simple. Clamp it to your microphone stand. Bend the gooseneck into position. Place the filter a few inches in front of your microphone. Start recording.
A traditional mesh filter also creates a useful physical barrier between you and the microphone. That’s important because beginners often move closer and closer to the microphone without realizing it. The pop filter gives you a visual reference for maintaining a consistent distance.
If you’re buying your first condenser microphone and need an inexpensive pop filter to go with it, the MPF-6 is an easy place to start.
Best for: Beginners and budget home studios.
3. Shure PS-6 Popper Stopper – Best from a Major Microphone Brand
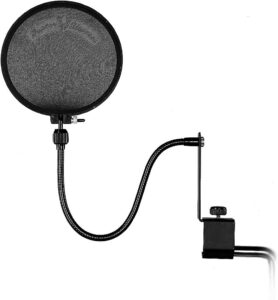
Shure makes some of the most recognizable microphones in the world, so it isn’t surprising that the company also offers a dedicated pop filter.
The PS-6 Popper Stopper is designed to reduce breath noise and plosives during vocal recording. It uses a clamp system that can attach to most microphone stands.
This makes it useful with many different microphones rather than locking you into one particular model. That’s an important distinction.
Some pop filters are designed to attach directly to specific microphones. Others, such as the PS-6, attach to the stand. A stand-mounted design can continue working even when you replace your microphone.
For someone building a long-term studio setup and wanting a straightforward pop filter from an established professional audio company, the PS-6 is worth considering.
Best for: Vocals, voiceovers, and general studio recording.
4. Aokeo Professional Pop Filter – Best Affordable Alternative
Aokeo’s pop filters have become popular among people putting together inexpensive home recording setups. The appeal is simple. You get the familiar large circular filter, flexible gooseneck, and clamp without spending much money.
A dual-layer mesh design can help break up the burst of air before it reaches the microphone. The first layer slows and spreads the air. The gap between the layers gives it room to disperse.
Then the second layer provides additional protection before the remaining air reaches your microphone.
This approach has been used in affordable pop filters for years because it’s simple and effective. Build quality and gooseneck stability are where inexpensive filters can differ from professional options.
A cheap gooseneck may slowly move out of position, especially when the filter is stretched horizontally. But for someone recording their first podcast or YouTube voiceover, an affordable filter may be all that’s necessary.
Best for: Budget podcast and home recording setups.
5. Stedman Proscreen PS101 – Best Compact Metal Pop Filter
Maybe you like Stedman’s metal design but don’t need the larger XL version. Consider the Proscreen PS101. It uses the same basic idea of redirecting airflow rather than relying entirely on fabric.
The PS101 has a smaller screen, making it easier to fit into a crowded recording setup. That’s particularly useful if your microphone is attached to a desk-mounted boom arm.
A giant six-inch filter can sometimes get in the way. It may block your view. It may make microphone positioning more difficult. Or it may simply take up more space than necessary. A smaller filter can provide the plosive protection you need while keeping the setup cleaner.
The PS101 is particularly interesting for voiceover and podcast setups where one person remains in roughly the same position.
Best for: Small studios, boom arms, voiceovers, and compact setups.
6. RØDE WS2 – Best Foam Alternative
The RØDE WS2 isn’t a traditional pop filter. It’s a foam windshield. Instead of sitting several inches in front of your microphone, it fits directly over compatible microphones.
RØDE designed it for broadcast-style and large-diaphragm microphones, including models such as the PodMic, Procaster, Broadcaster, NT1, and NT2-A.
It helps prevent strong plosive sounds from overloading the microphone capsule.
A large circular pop filter can block part of your face on camera, which isn’t always ideal for video podcasts or streaming. A foam windshield keeps the setup much cleaner. However, a foam windshield and a traditional pop filter aren’t exactly the same thing.
For close studio vocals where maximum plosive protection is important, I’d generally prefer a proper pop filter positioned in front of the microphone.
Best for: Podcasts, broadcasting, video setups, and compatible RØDE microphones.
7. Generic Dual-Layer Nylon Pop Filter – Best for Beginners
Sometimes you don’t need a brand name. There are countless inexpensive dual-layer nylon pop filters available.
For a beginner, many of them work perfectly well. Look for three things.
First, choose a large enough screen. Around six inches is common and provides plenty of room for normal vocal movement. Second, check the clamp. A great filter with a terrible clamp becomes frustrating very quickly. Third, look at the gooseneck. It needs to be flexible enough to position easily but stiff enough to stay where you put it. This is where ultra-cheap filters sometimes fail.
If you’re spending $500 on a microphone, I’d invest in a better filter. If you’re experimenting with a $100 home studio setup, a simple dual-layer filter can get the job done.
Best for: First-time creators and inexpensive setups.
What Does a Pop Filter Actually Do?
A pop filter reduces the rush of air created by plosive consonants before that air reaches your microphone. This is different from reducing normal background noise.
A pop filter won’t remove your air conditioner. It won’t eliminate traffic. It won’t stop keyboard clicks. And it won’t make a bad room sound acoustically treated. Its main job is controlling air.
Words containing strong P and B sounds are common sources of problems. Without a filter, that air can hit the microphone capsule and create a powerful low-frequency burst.
A pop filter disperses or redirects the air while allowing the sound of your voice to continue toward the microphone.
Metal vs Nylon Pop Filters
This is one of the biggest decisions you’ll make. Traditional pop filters usually use one or more layers of nylon or similar fabric. They’re inexpensive and can work extremely well.
A dual-layer design gives the air more opportunity to disperse before reaching the microphone. Metal filters take a different approach.
Stedman’s Proscreen design, for example, redirects airflow downward away from the microphone capsule.
Metal is also durable and easy to clean. The downside is price. A quality metal filter can cost several times more than a basic nylon model.
For beginners, nylon is perfectly fine. For a professional studio where the filter gets used every day, the durability of metal becomes much more attractive.
Pop Filter vs Windscreen: What’s the Difference?
These accessories are often confused. A pop filter usually sits between your mouth and microphone. Its main job is controlling plosives during close vocal recording.
A windscreen normally fits directly over the microphone. Foam windscreens can help with breath and light wind noise.
More substantial wind protection is required when microphones are used outdoors in stronger wind.
For indoor studio vocals, I’d normally start with a pop filter. For podcasting with a broadcast-style dynamic microphone, a foam windscreen can be more convenient. Some people even use both when necessary.
How Far Should a Pop Filter Be From the Microphone?
A good starting point is around two inches between the filter and microphone. Then leave some distance between your mouth and the filter. This gives the burst of air room to dissipate before reaching the microphone capsule.
But don’t treat this as a fixed rule.
Experiment.
Microphone type, vocal style, recording level, and how strongly you produce plosive sounds all affect the ideal distance.
A loud singer may need more space. A quiet voiceover artist may work closer. The important thing is that your mouth shouldn’t be pressed against the filter and the filter shouldn’t be pressed directly against a sensitive microphone capsule.
Do Dynamic Microphones Need Pop Filters?
Sometimes. Many broadcast dynamic microphones already have internal foam or filtering designed to reduce plosives.
But that doesn’t mean they’re immune. Speak very close to a microphone and strong P sounds can still create problems.
That’s why you’ll often see large foam windscreens on broadcast microphones. For a microphone such as the Shure SM7B, the external foam windshield is part of the design.
For other dynamic microphones, adding a pop filter or windscreen can improve close-mic recordings. Listen to your recording. If you’re hearing plosives, add protection.
Which Pop Filter Should You Buy?
For a professional studio, my top choice is the Stedman Proscreen XL V2.
Its metal design redirects airflow away from the microphone, while the large screen, long gooseneck, and universal clamp make it suitable for a wide range of recording setups.
For a traditional affordable option, consider the Nady MPF-6 or a quality dual-layer nylon filter.
If you want a trusted studio accessory from a major microphone company, the Shure PS-6 is a straightforward choice.
For compact setups, look at the Stedman PS101.
And if you use a compatible RØDE broadcast microphone and want something less visually intrusive, the RØDE WS2 foam windshield can be more convenient than a large external screen.
Final Thoughts
A pop filter isn’t the most exciting piece of studio equipment. Plosives can ruin otherwise excellent vocals, podcast recordings, and voiceovers. Preventing them before they hit the microphone is much easier than trying to repair them afterward.
For most professional recording setups, the Stedman Proscreen XL V2 is my best overall pop filter. Its six-inch metal screen is designed to redirect bursts of air downward, and its universal clamp can attach to boom arms and stands up to 1.5 inches wide.
But beginners don’t need to spend that much. A basic dual-layer nylon filter positioned correctly can make a major difference.
Whichever one you choose, combine it with good microphone technique. Keep a sensible distance from the microphone. Try speaking slightly off-axis.
And don’t put the microphone directly in the path of every burst of air leaving your mouth. Sometimes the cheapest accessories in your studio prevent the biggest recording problems.